Booking Form Settings Overview (Editor V2)
Allowing direct bookings on your website is a great way to increase your profits, by avoiding fees charged by OTA's.
To get direct bookings for your Webready website, you must first subscribe to the Booking Engine app from the App Store.
The Booking Form Settings allow you to customize the look and feel of the booking process.
Here we'll take a look at the different Booking Form options.
Navigating to the Booking Form Settings:
To adjust your Booking Form Settings, you will need to go to the Website Editor and select your Booking page.
- Select the Booking page

- Hover over the Booking Form area and click the Settings option
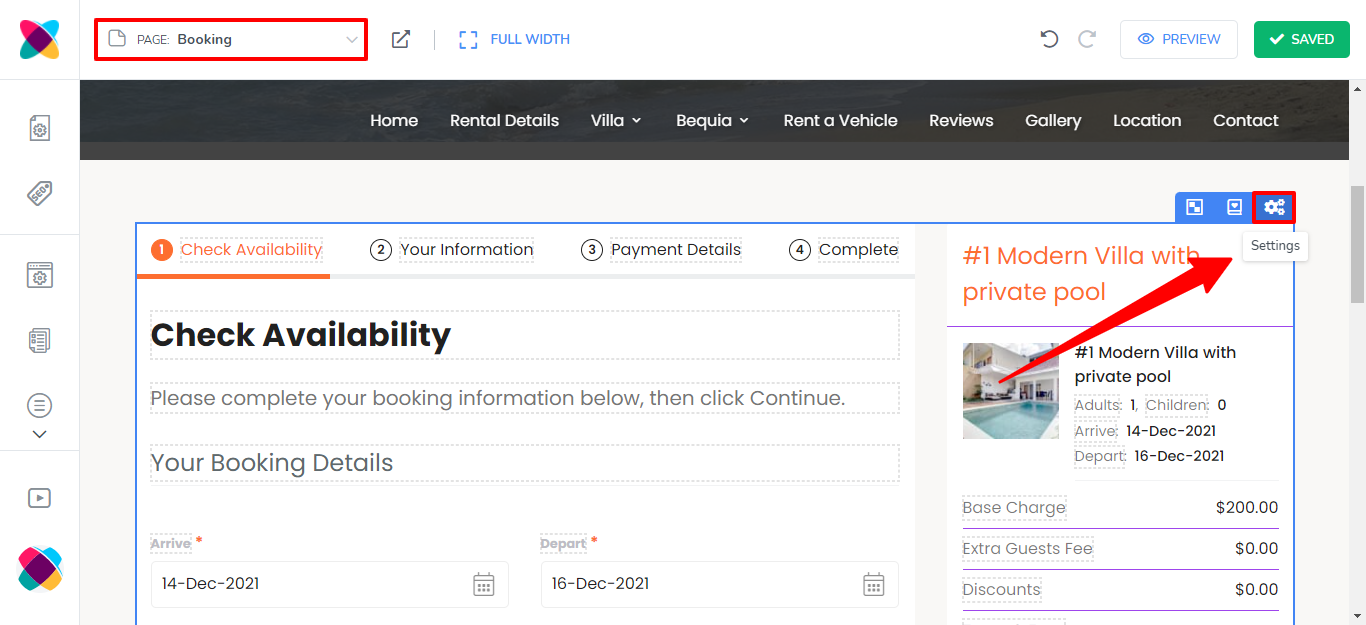
- In the Settings pop up, you will see various tabs available
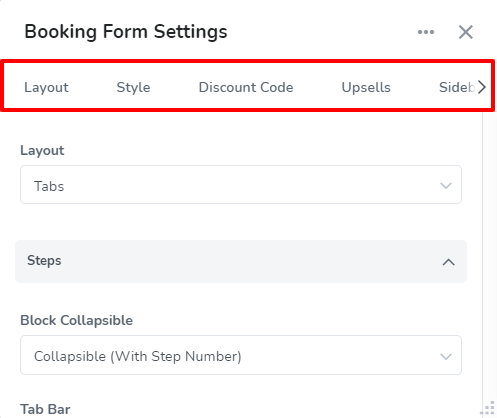
Each tab allows you to make different changes to the booking form. They are outlined as follows:
Layout tab:
Here, you will be able to specify if the booking form steps should be displayed after each other, continuously down the page as blocks, or if each step should show in a separate tab.
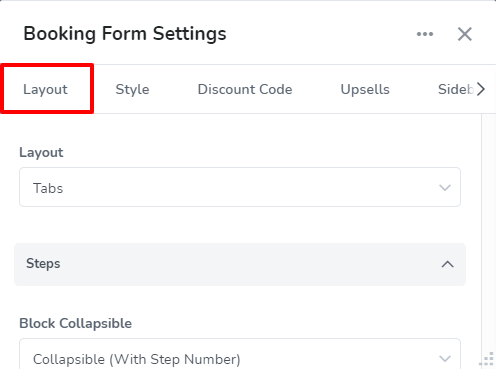
Further customization will be possible for the following:
Steps - Choose whether to include a "Complete" step as part of the booking process, which will allow guests to review their information before submitting the booking. You will also be able to select how the blocks or tabs should be displayed.
Booking Form Info - This section lets you specify where the booking form should be placed, and allow you to adjust how the booking dates and guest count input fields are displayed.
Phone Number - Here, you can choose if you will require guests to enter a country code with their phone number or if and how a default value should be added. You can also specify if you will like phone numbers to be validated.
For a full breakdown of the Layout tab, please refer to the article here.
Style tab:
This tab allows you to pick an overall look for your booking form and offers many options to finetune the color used in different areas.
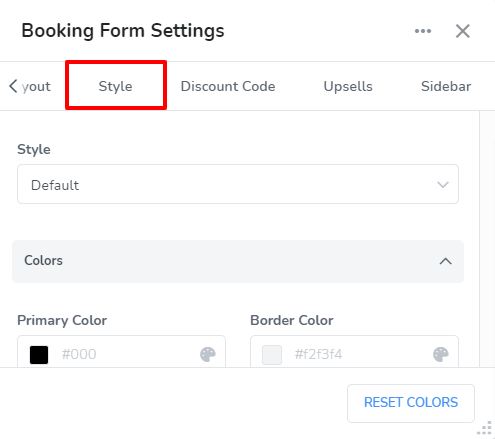
Some of the colors you'll be able to adjust include:
- Primary Color
- Text Colors
- Tab Bar Colors
- Sidebar Colors
Please review this article for more details on each section contained on this tab.
Discount Code tab:
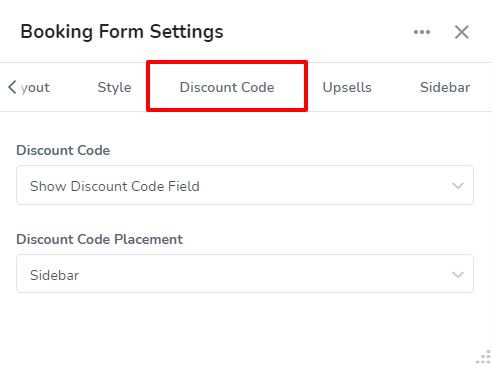
Choose if to allow guests to enter a discount code and select how it should be displayed. You will also be able to specify where it will be shown.
See more details here.
Upsells tab:
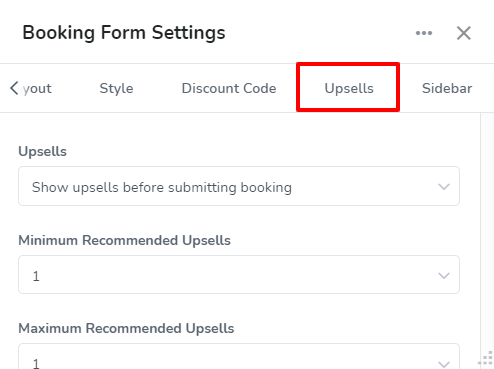
Specify if you will be allowing upsells to be shown to guests on your website and if they will be available before the booking is submitted or after. Also, choose how the booking total is displayed once a guest adds an upsell to their booking.
For more details on the Upsells tab, please review this article.
Minimum Recommended Upsells - This allows you to set the minimum number of upsells that will be displayed to the guest in your Recommended For You section of the available upsells.
Maximum Recommended Upsells - Similarly, with this setting, you can choose the maximum number of upsells that will be displayed to the guest in your Recommended For You section of the available upsells.
Booking Price Breakdown - Once an upsell is chosen, it will be displayed along with the booking totals, this option lets you specify if the booking total will be collapsed or expanded by default when an upsell is added.
Sidebar tab:
Customize what the Sidebar title should be, if to show a rental info section as well as the check-in/check-out time zone. You will also be able to choose if the check-in/check-out times will be shown based on the rental details or the guest's timezone.
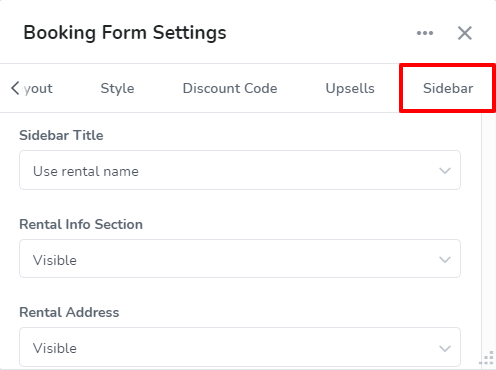
Sidebar Title - Choose whether the sidebar title should automatically display the rental name or custom text that you will enter.
Rental Info Section - Specify whether the rental info section will be displayed. It shows details such as the address, check-in/check-out times and payment terms.
Check-in / Check-out Time - Adjust how the check-in/check-out times will be shown to the guest. It can be shown in the time zone specified within the rental details in Webready or it can show the time in the guest's time zone.
Check-in / Check-out Time Zone - Choose whether to display the time zone for the check-in and check-out times.
Click here to get more information on the settings for this tab.